Touch Screen
Displays can optionally include a touch overlay so users can interact with the device by touching the screen. Two technologies are common:
- Capacitive — what modern phones use. Accurate, supports multi-touch, no calibration needed. Preferred for new designs.
- Resistive — works through pressure (so usable with gloves) but less accurate and needs calibration.
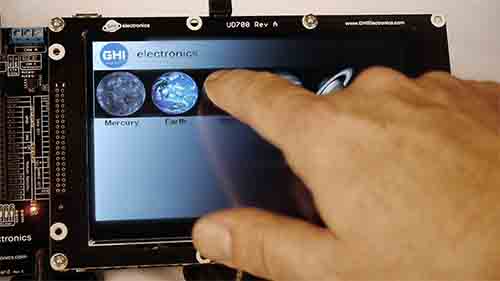
Capacitive
Capacitive panels use a dedicated controller chip on the panel's flat cable, talking to the SITCore over I²C (most common) or SPI. The capacitive displays in GHI Electronics' development options use a FocalTech FT5xx6 controller, supported by the GHIElectronics.TinyCLR.Drivers.FocalTech.FT5xx6 NuGet package.
The driver reports touch position in display pixels — no scaling or calibration code needed. The driver source lives in the TinyCLR-Drivers repo.
The example below subscribes to TouchMove and draws a small ellipse at every reported point:
using GHIElectronics.TinyCLR.Drivers.FocalTech.FT5xx6;

var touch = new FT5xx6Controller(
    i2cController.GetDevice(FT5xx6Controller.GetConnectionSettings()),
    gpioController.OpenPin(SC20260.GpioPin.PJ14)        // Reset pin.
);

touch.Orientation = FT5xx6Controller.TouchOrientation.Degrees0;

touch.TouchMove += (sender, e) => {
    screen.FillEllipse(brush, e.X, e.Y, 5, 5);
    screen.Flush();
};
Orientation lets you rotate the touch coordinate system if the display is mounted at 90°, 180°, or 270° relative to the panel's native orientation.
Resistive
Resistive panels work by sensing the resistance change across X and Y axes when finger pressure shorts the layers together. The TinyCLR driver implements this using GPIO + ADC — four pins to drive the X/Y rails and two ADC channels to read the resulting voltages.
The GHIElectronics.TinyCLR.Drivers.Touch.ResistiveTouch NuGet package wraps the pin sequencing and conversion math:
using GHIElectronics.TinyCLR.Drivers.Touch.ResistiveTouch;

var touch = new ResistiveTouchController(
    screenWidth:  320,
    screenHeight: 240,
    xPlusPin:  SC20260.GpioPin.PA0,         // Digital pin that's also analog-capable.
    yPlusPin:  SC20260.GpioPin.PA3,         // Digital pin that's also analog-capable.
    xMinusPin: SC20260.GpioPin.PA5,         // Digital-only.
    yMinusPin: SC20260.GpioPin.PC3,         // Digital-only.
    adcControllerId: SC20260.Adc.Controller1.Id,
    xAdcChannel: SC20260.Adc.Controller1.PA0,
    yAdcChannel: SC20260.Adc.Controller1.PA3
);

// Calibration — tune to match your specific panel.
touch.ScaleX = new Scale(20, 280);
touch.ScaleY = new Scale(20, 200);

while (true) {
    Thread.Sleep(100);          // Poll every 100 ms.

    var x = touch.X;
    var y = touch.Y;

    if (x >= 0 && y >= 0)
        Debug.WriteLine("X: " + x + ", Y: " + y);
}
The ScaleX and ScaleY properties let you trim the raw ADC range to match your panel — the right values come from a calibration step (touch the four corners, record the readings, work out the mapping).
Choose resistive when you need glove or stylus operation; otherwise capacitive is the better default.